Over the last two weeks I have been chief elf for one of my mentors Dave Jackson AKA The Stick Smith. Dave is a master at coming up with creative ways to use coppiced materials such as hazel and oak and has a great range of modern products. My favourite products to work on were the bird feeders. One was designed to hold an apple and the other used recycled wine bottles to hold some birdseed. I’m keen to learn traditional skills but I’m glad to have some experience in making high end products that create coppiced products with a modern twist.
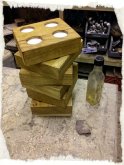
Dave also made reindeer, wreaths, Christmas decorations, whistles and tea light holders.
I asked Dave about selling at markets and if he had any tips on pricing. Dave explained that he would adjust the prices depending on how well a product was selling. For example the bird feeders were struggling to sell at £20 so Dave brought them down to £15. Once they started flying off the shelf… he creeped the price up to £18. This didn’t effect the sales but he wasn’t sure they would break the £20 mark so he kept them at this price and managed to almost sell them all. Experimenting like this seems really useful on a weekend market where you have three days to try and understand your customer and work out what they are willing to pay.
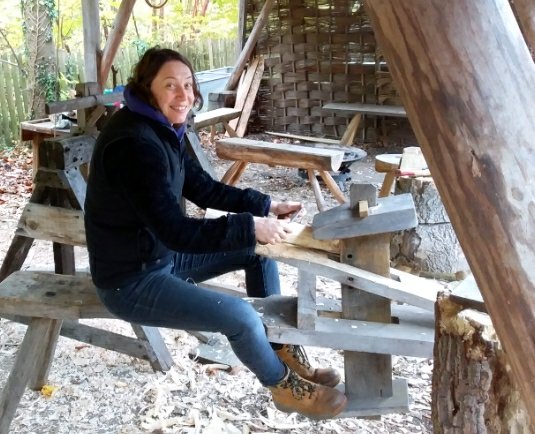
Yesterday I had the honour of working with Small Woods Heritage Craft Officer, Neill Mapes. Neill was running the fantastic Build A Bench workshop with a group of local people. The group were already well ahead of me with their welsh stick chairs so I decided to make a start on a milking stool instead. This will be my first chair and I’m very excited about it.
The first job was to cleave some ash into leg sized pieces. Next an axe was used to pare down the legs into a leggy shape, and prepare the end to be more or less the same size as a 1 inch tenon cutter. The legs were shaped further on the shaving horse with a draw knife.
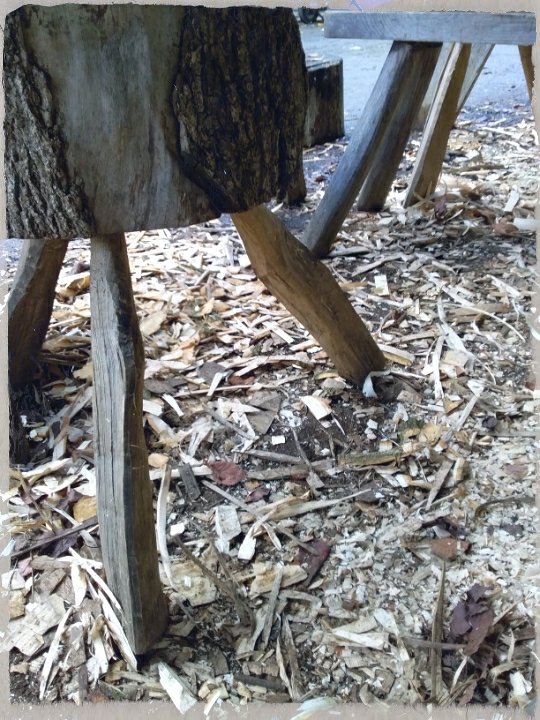
To attach the legs to the chair I will be using green wood working. This means that I will dry the legs by a radiator for a few days then attach them to a ‘green’ seat. As the unseasoned green seat drys it will shrink around the legs, meaning that, apart from a few wedges, there will be no need for screws or nails. Ingenious!
I cut the seat out on a bandsaw and its ready to go once the legs have dried.
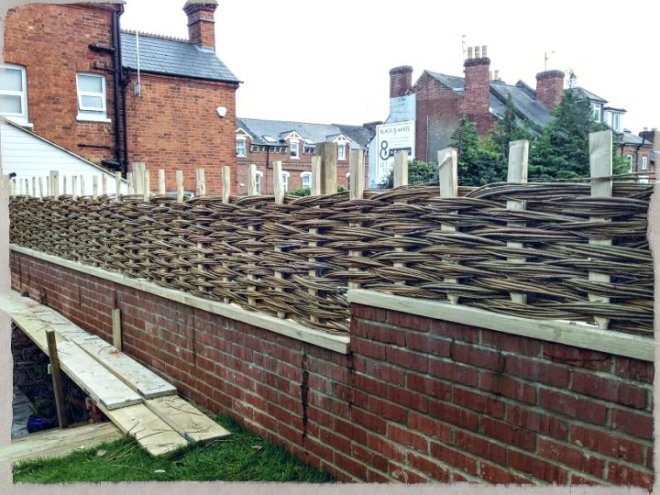
Today I had a chance to work on a willow in-situ hurdle. The fence was about 10mtrs long topping a small brick wall. My new mentor, Dave Jackson, started the fence by drilling oak beams to the top of the brick wall as supports for the sweet chestnut uprights. We then weaved in wet and dry willow rods that were cut about one year ago.
This was an easy enough job with a beautiful finish. This is going to be a wonderful skill to have.
Top tips for the day:
Keep the butts of the rods that you add to the hurdle as close to the uprights as possible. This will reduce the amount of pruning at the end of the job.
Use thicker rods to correct any uprights that are being pushed out of alignment. The stronger rods will push the uprights back but be careful not to push them back yourself too much as they can snap.
Mix the sizes of rods you use in each handful so that all the different sized rods get used and there is a good variety of sizes across the hurdle.
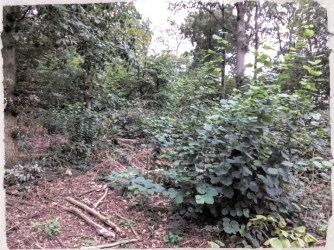
One of the hard questions in coppicing is what to do with all the bits of hazel on a stool (that’s what the trunk that the new shoots grow from is called) that have grown all bendy.
Bendy rods (aka branches) can occur for a few reasons. It may be due to ‘browsing’ from wildlife such as deer. Muntjac deer are very common in the woods where we work and are a pain for coppicers. There are various ways that people use to stop the deer but the most effective it seems is building a huge blummin’ fence. My mentor and myself did speculate whether a stuffed lion or two might work well instead after I mentioned that my father used to be a taxidermist. If we try this I’ll let you know how it goes.
Another reason for bendy rods can be a lack of light. If the shoots have to compete for light with the standard trees (the trees that are left to grow to full size) then they’ll contort their way towards the light that is available. This can also slow growth which can lead to more twisty turny bits. A coppice works best without standards as the coppiced trees get the maximum amount of light but sometimes space is a premium and standards can provide firewood and also a more varied environment for wildlife. When standards are used/left they should only take up 40% of the canopy cover, leaving 60% of the sky still visible.
Anyway, I’ve digressed… Let’s talk about crafts!
Coppicers come up with many ingenious ideas for what to do with all the little bits of wood. Products such as whistles or pencils are popular as well as gypsy flowers and even little christmas decorations.
Over the last few months as I’ve been preparing for the apprenticeship I have also been wondering what I could make with all those little bits. I decided that, however bendy a rod, you can always make disks and a disk is a very useful shape indeed.
My inventions so far have included ‘tree hanging’, bracelets and bowels, all made partly from discs or small bits of sticks. I’m keen to use as much of the stuff we cut down – apart from whatever would be beneficial as habitat homes – and find as many uses as we can. My mentor is also keen on this practice. After drilling holes in some candle holders we decided that the shaving were too good to throw and thought about how they could be used (we decided perhaps some kind of delicate flower decoration).
The level of creativity in this is endless when your base material is the humble stick!
One of the many things I’m looking forward to during my apprenticeship is meeting the various local coppicing communities. Coppicers tend to work alone as sole traders and this means that networks are an important way for local coppicers to meet and share skills and stories.
This weekend I had the honour of being invited along to one of the East Anglian Coppice Network events being held at a woodland owned by Iain Loasby. I met Iain after discovering his shop just up the road from me in London. When I came across his shop a year ago I was intrigued by this strange shop that seems to being selling a variety of sticks. When I won the national coppicing apprenticeship I was delighted to remember this shop and realised what a treasure was on my door stop. Although the name would suggest otherwise, Wood Green was the last place I’d expect to find a coppicers shop.
So a few weeks ago I eagerly presented myself to Iain as a fledgling coppicer and was invited along to the network event.
On the agenda this time around was Besoms Brooms and Traditional Rakes. Both of these, especially brooms, are a staple for coppicers and although not used as much for their originally purpose still attract customers looking for a nice item on their wall.
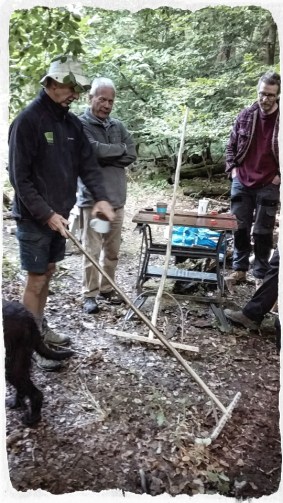
Andy and Paul showing us different types of rakes
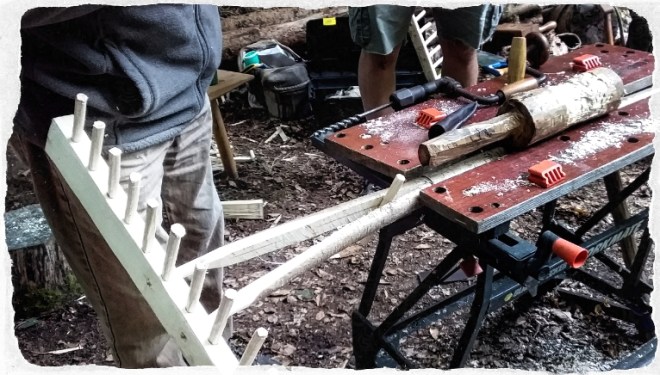
First up was Paul, a newly retired coppicer, who showed us how to make an ash rake. Rakes often come with regional differences and can use a split handle or a flexible piece of hazel to brace the head. I believe in this case we were being taught the Suffolk way of putting a rake together.
Before anything else you need a nice piece of ash around 6 – 10cm in
splitting the Ash log
diameter to make heads. We were lucky enough to have a lovely piece of ash that split beautifully and I was assured it wasn’t always this easy.
Once you have a rough size its time to use a shave horse to take the bark off and turn it into a lovely smooth piece of wood. Paul chose to ‘batter’ his heads which is a bricklaying term that means making the top of the head thinner than the bottom, but Andy, another coppicer at the event didn’t think this was necessary.
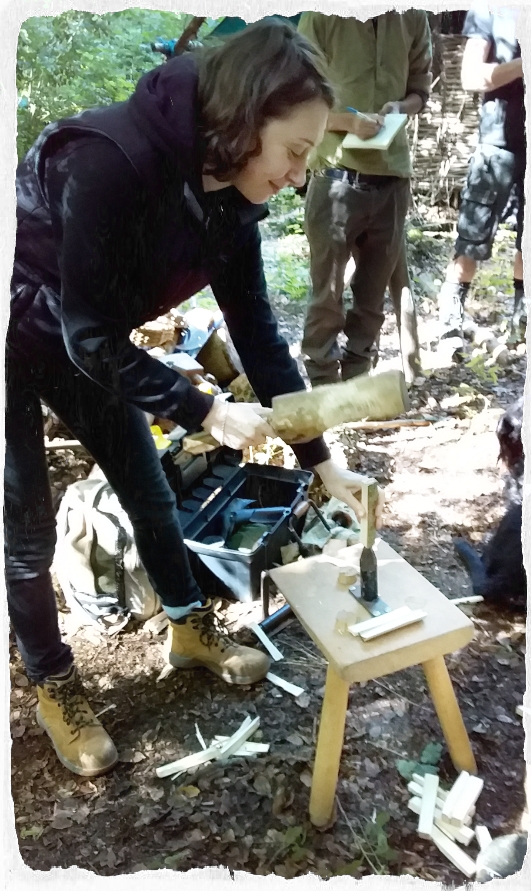
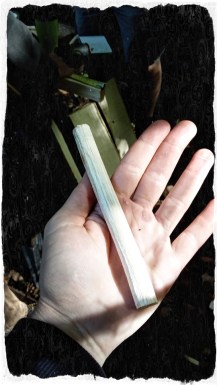
Making the pegs was an interesting process. First a piece of tree truck the same length as you want your pegs was split into tiny pieces, using an old inner tube to hold the wood together, then these pieces were jammed through a piece of metalwork called a tine cutter. Apparently its useful to have a splayed end on your tine cutter so that the tines don’t get stuck as they push through the hole.
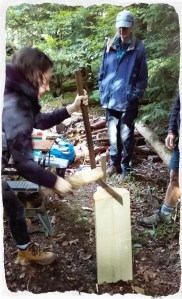
One of the great things about the day was getting these sorts of little hints and tips from the experienced coppicers. “Throw the mallet instead of hit it” was advice from Andy which stopped my wrist hurting so much, and “aim for down here” was more great advice from Paul as he pointed to half way down the piece of wood I was preparing to split with a Froe (a type of wood splitting tool).
After the tines/pegs were made the next task was to drill holes into the head. Paul suggested using a ‘green’ head (a piece of wood that hasn’t been seasoned) with seasoned pegs. This would mean that the head would season and shrink around the pegs, holding them into place.
The pegs were then shaved down on two sides and bashed in with a mallet. Next we needed to choose a handle and split the end. A rake handle can be quite long and needs to be straight as possible but can have some wiggles* in it for character. After the handle and head are fixed together copper nails were used to keep the head and handle together.
joining the head and the handle together
Another handy tip to remember was to drill a hole at the end of the split and wrap some wire around to keep the split from going any further.
Besom Brooms
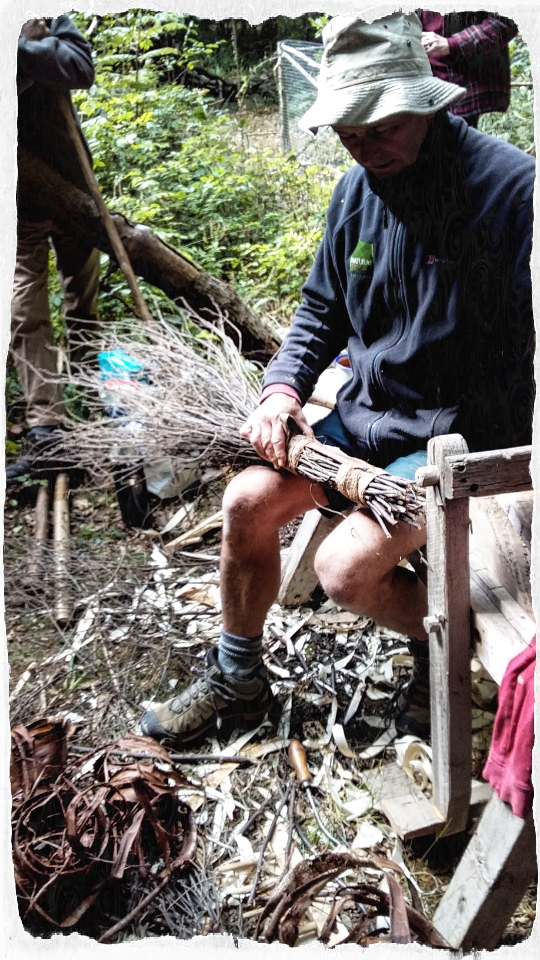
Andy showing us how to bind birch sprays with elm bark
In the afternoon it was Andy Bashem‘s turn to show us how to make a good broom. I’ve already helped my mentor Mark to collect birch ‘sprays’ (birch sticks) so it was interesting to see the next step in the process.
Andy chooses to make all natural brooms without any metal parts as this seems to appeal
more to witches. No, this isn’t a joke. Apparently wiccans use besom brooms to clear old spells from ritual spaces but the brooms mustn’t contain any metal. This is the kind of vital information passed on during networking events. There is also an aesthetic reason for a wireless broom but it does take much more time to make.
One starts off by grabbing a handful of birch sprays then moving them around until all the bottoms of the twigs are lined up. You need a bit space to wrap around your binding material so any twigs that are in the way are pruned. When your happy with your bundle of birch sprays you can then start the wrapping process. In this case we used some Elm Bark that Andy had had in his barn for a couple of years. To refresh it he simply soaked it in water for a couple of hours the night before and the bark became flexible again like leather.
Once the binding was on tight we then drove a sharpened stake through the middle of the bundle and used a wooden peg to hold the handle in place. The peg is important to stop the twigs and the handle from separating and the customer being left with a very sharp stick in their hands. A good handle can also increase the price of a broom if it has special features like twists. Andy didn’t try to make the broom look all the same and believed that as people are all unique then the difference in the brooms would appeal to different people. As I didn’t pick up enough birch I was pleased to hear this and declared my very small broom a special camper van sized broom to fit into tiny houses just like my own. The broom was then bound with baling twine so that when the twine was removed in a few days the broom would maintain a slimmer shape.
Overall I had a lovely day with the East Anglian Coppice network. I raked in the knowledge and wasn’t swept away by all the new information at all.
I hope to visit some of the members coppices over the next few years and plan to join them at another event soon!
*I’ll develop my technical terminology as go – but in the mean time i’ll be making up my own…)
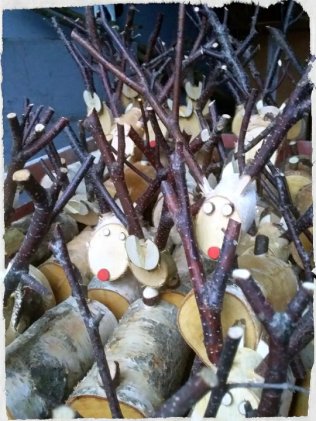 Over the last two weeks I have been chief elf for one of my mentors Dave Jackson AKA The Stick Smith. Dave is a master at coming up with creative ways to use coppiced materials such as hazel and oak and has a great range of modern products. My favourite
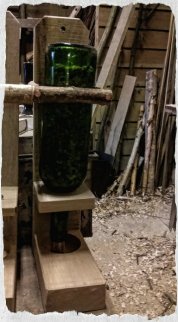 products to work on were the bird feeders. One was designed to hold an apple and the other used recycled wine bottles to hold some birdseed. I’m keen to learn traditional skills but I’m glad to have some experience in making high end products that create coppiced products with a modern twist.
 them down to £15. Once they started flying off the shelf… he creeped the price up to £18. This didn’t effect the sales but he wasn’t sure they would break the £20 mark so he kept them at this price and managed to almost sell them all. Experimenting like this seems really useful on a weekend market where you have three days to try and understand your customer and work out what they are willing to pay.


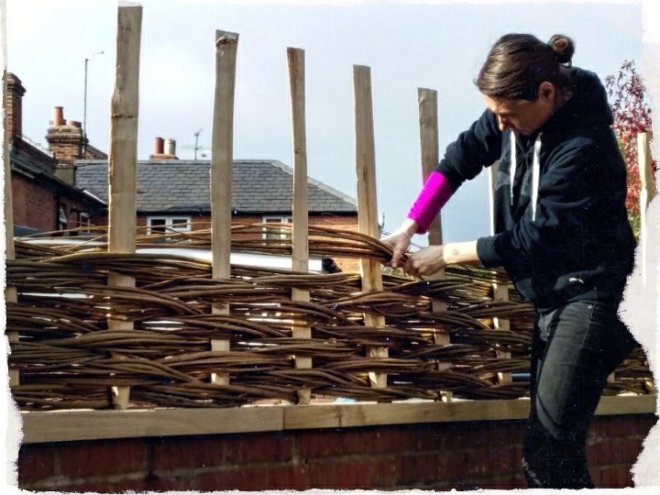 Today I had a chance to work on a willow in-situ hurdle. The fence was about 10mtrs long topping a small brick wall. My new mentor,
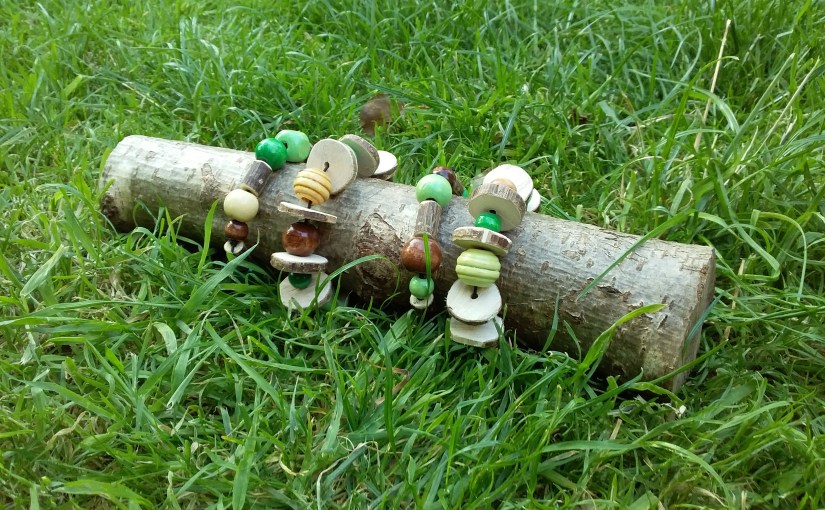


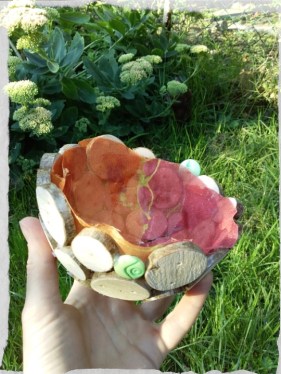 e also been wondering what I could make with all those little bits. I decided that, however bendy a rod, you can always make disks and a disk is a very useful shape indeed.